Being that it is Labor Day and what I’ve done is nothing amazingly exciting, I’ll be keeping this post short. I have to tell you though: I’m really excited.
I’ve been a caffeine junkie for quite some time, mostly in the form of energy concoctions based upon what I’ve learned about nootropics and stimulants. After a short romance with matè I’ve become quite enamored with coffee, or more specifically, the romance of and OCD required for pulling a great shot of espresso. What started off with a Hamilton Beach espresso maker has turned into a Franken-toy capable of pulling better shots than all but one coffee shop in town.
The Setup
While my machine could pull an OK shot when I first started with it, I found my grinder to be inadequate for the job, which necessitated the purchase of a Vaneli Mini Pro II. The grinder is often said to be the most important part of making great espresso.
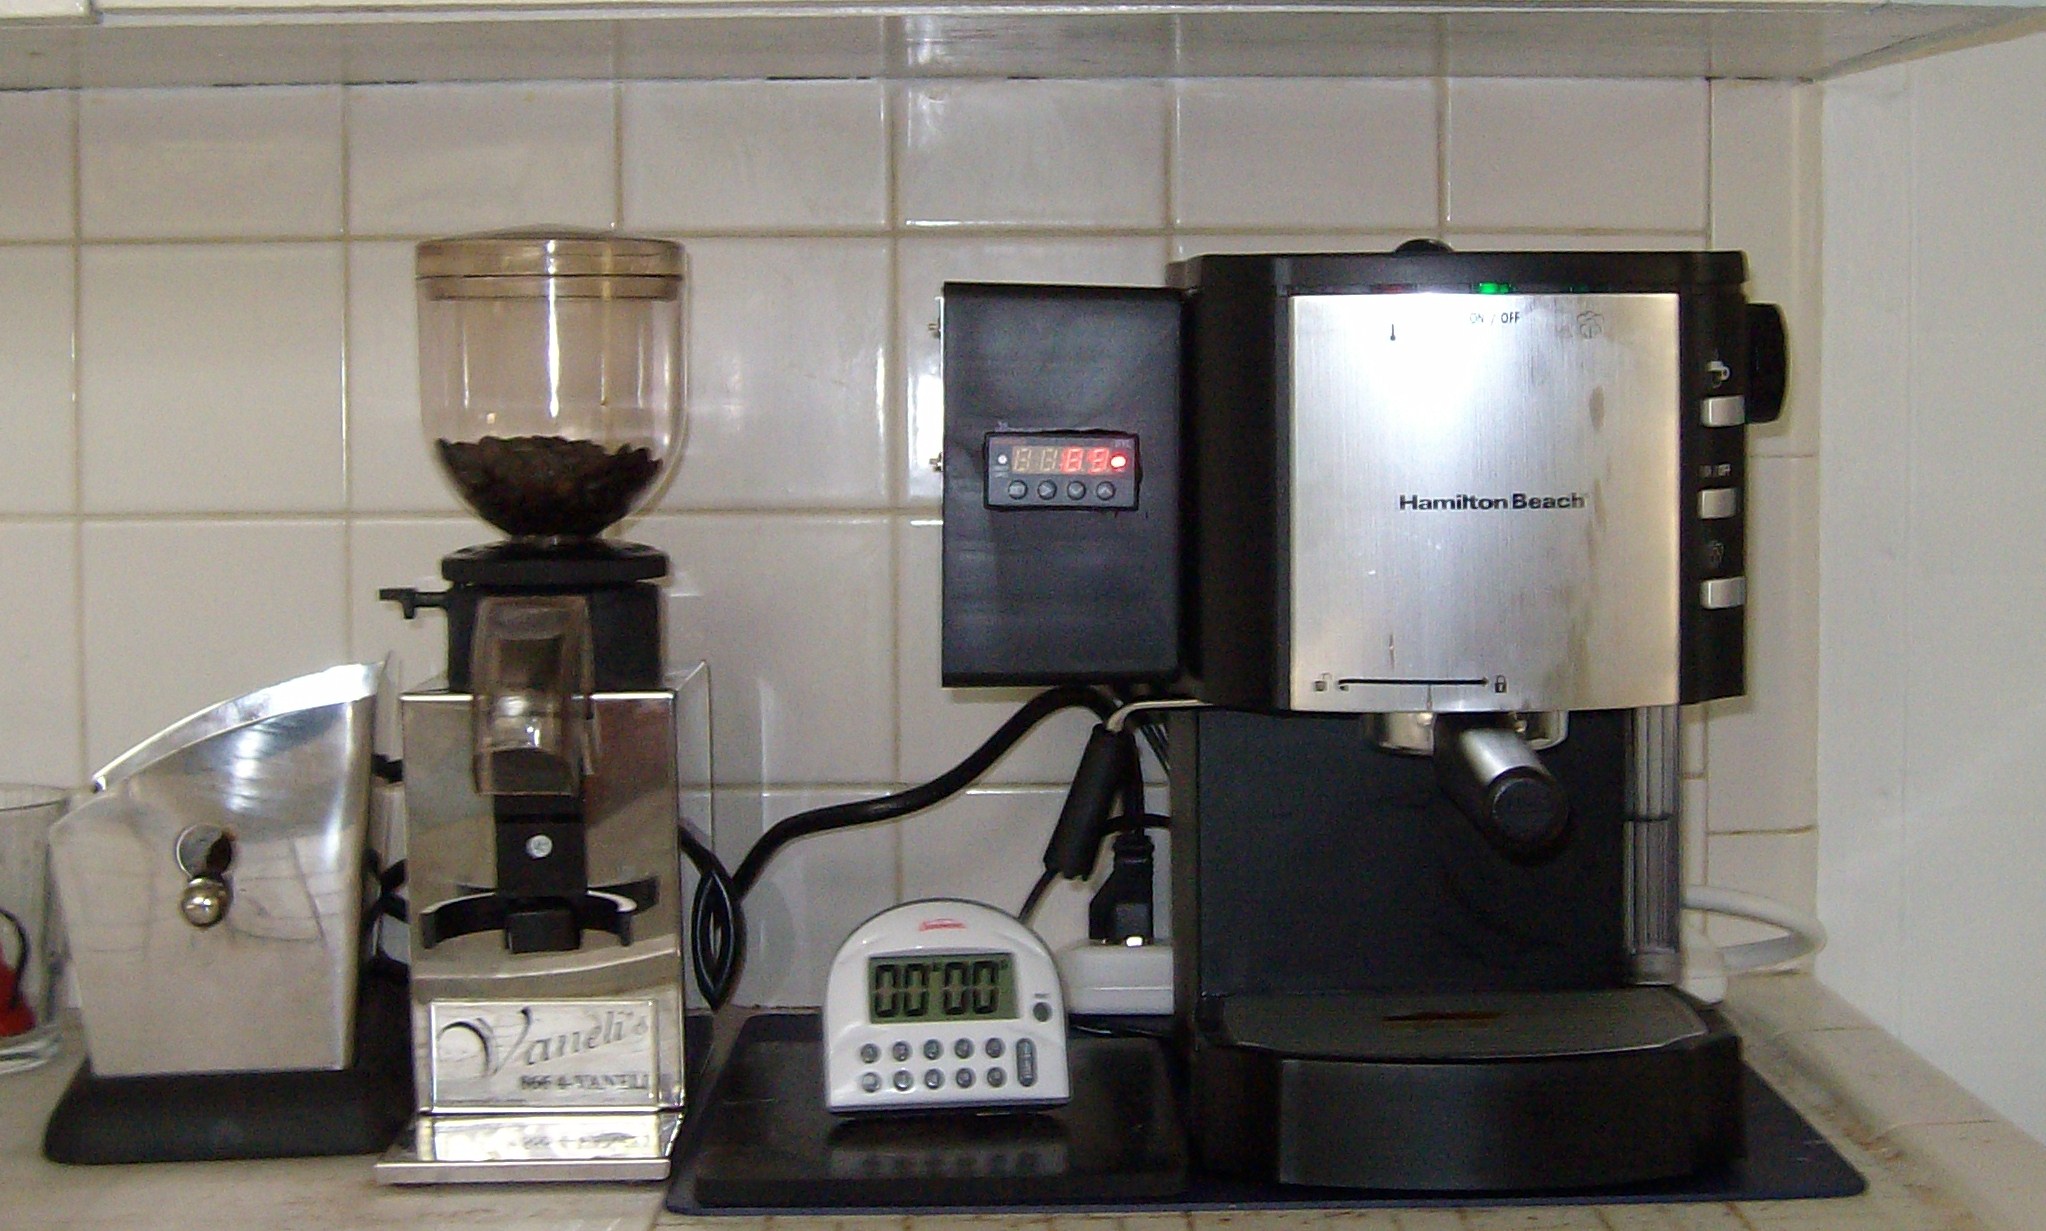
Notice the massive box with the red lights on the side of the machine? That’s my housing for a PID controller that I cobbled together from various sources. Most of my directions came from Murph’s Silvia PID page and my inspiration came from the Silk Purse Espresso page. Simply, a PID allows a snap-action boiler, like mine, to maintain a consistent temperature, which is the holy grail of consistent espresso shots. Because I bought the cheap Chinese controller, I keep the temperature setting in Celsius, as I’ve read it just works “better.”
The Result
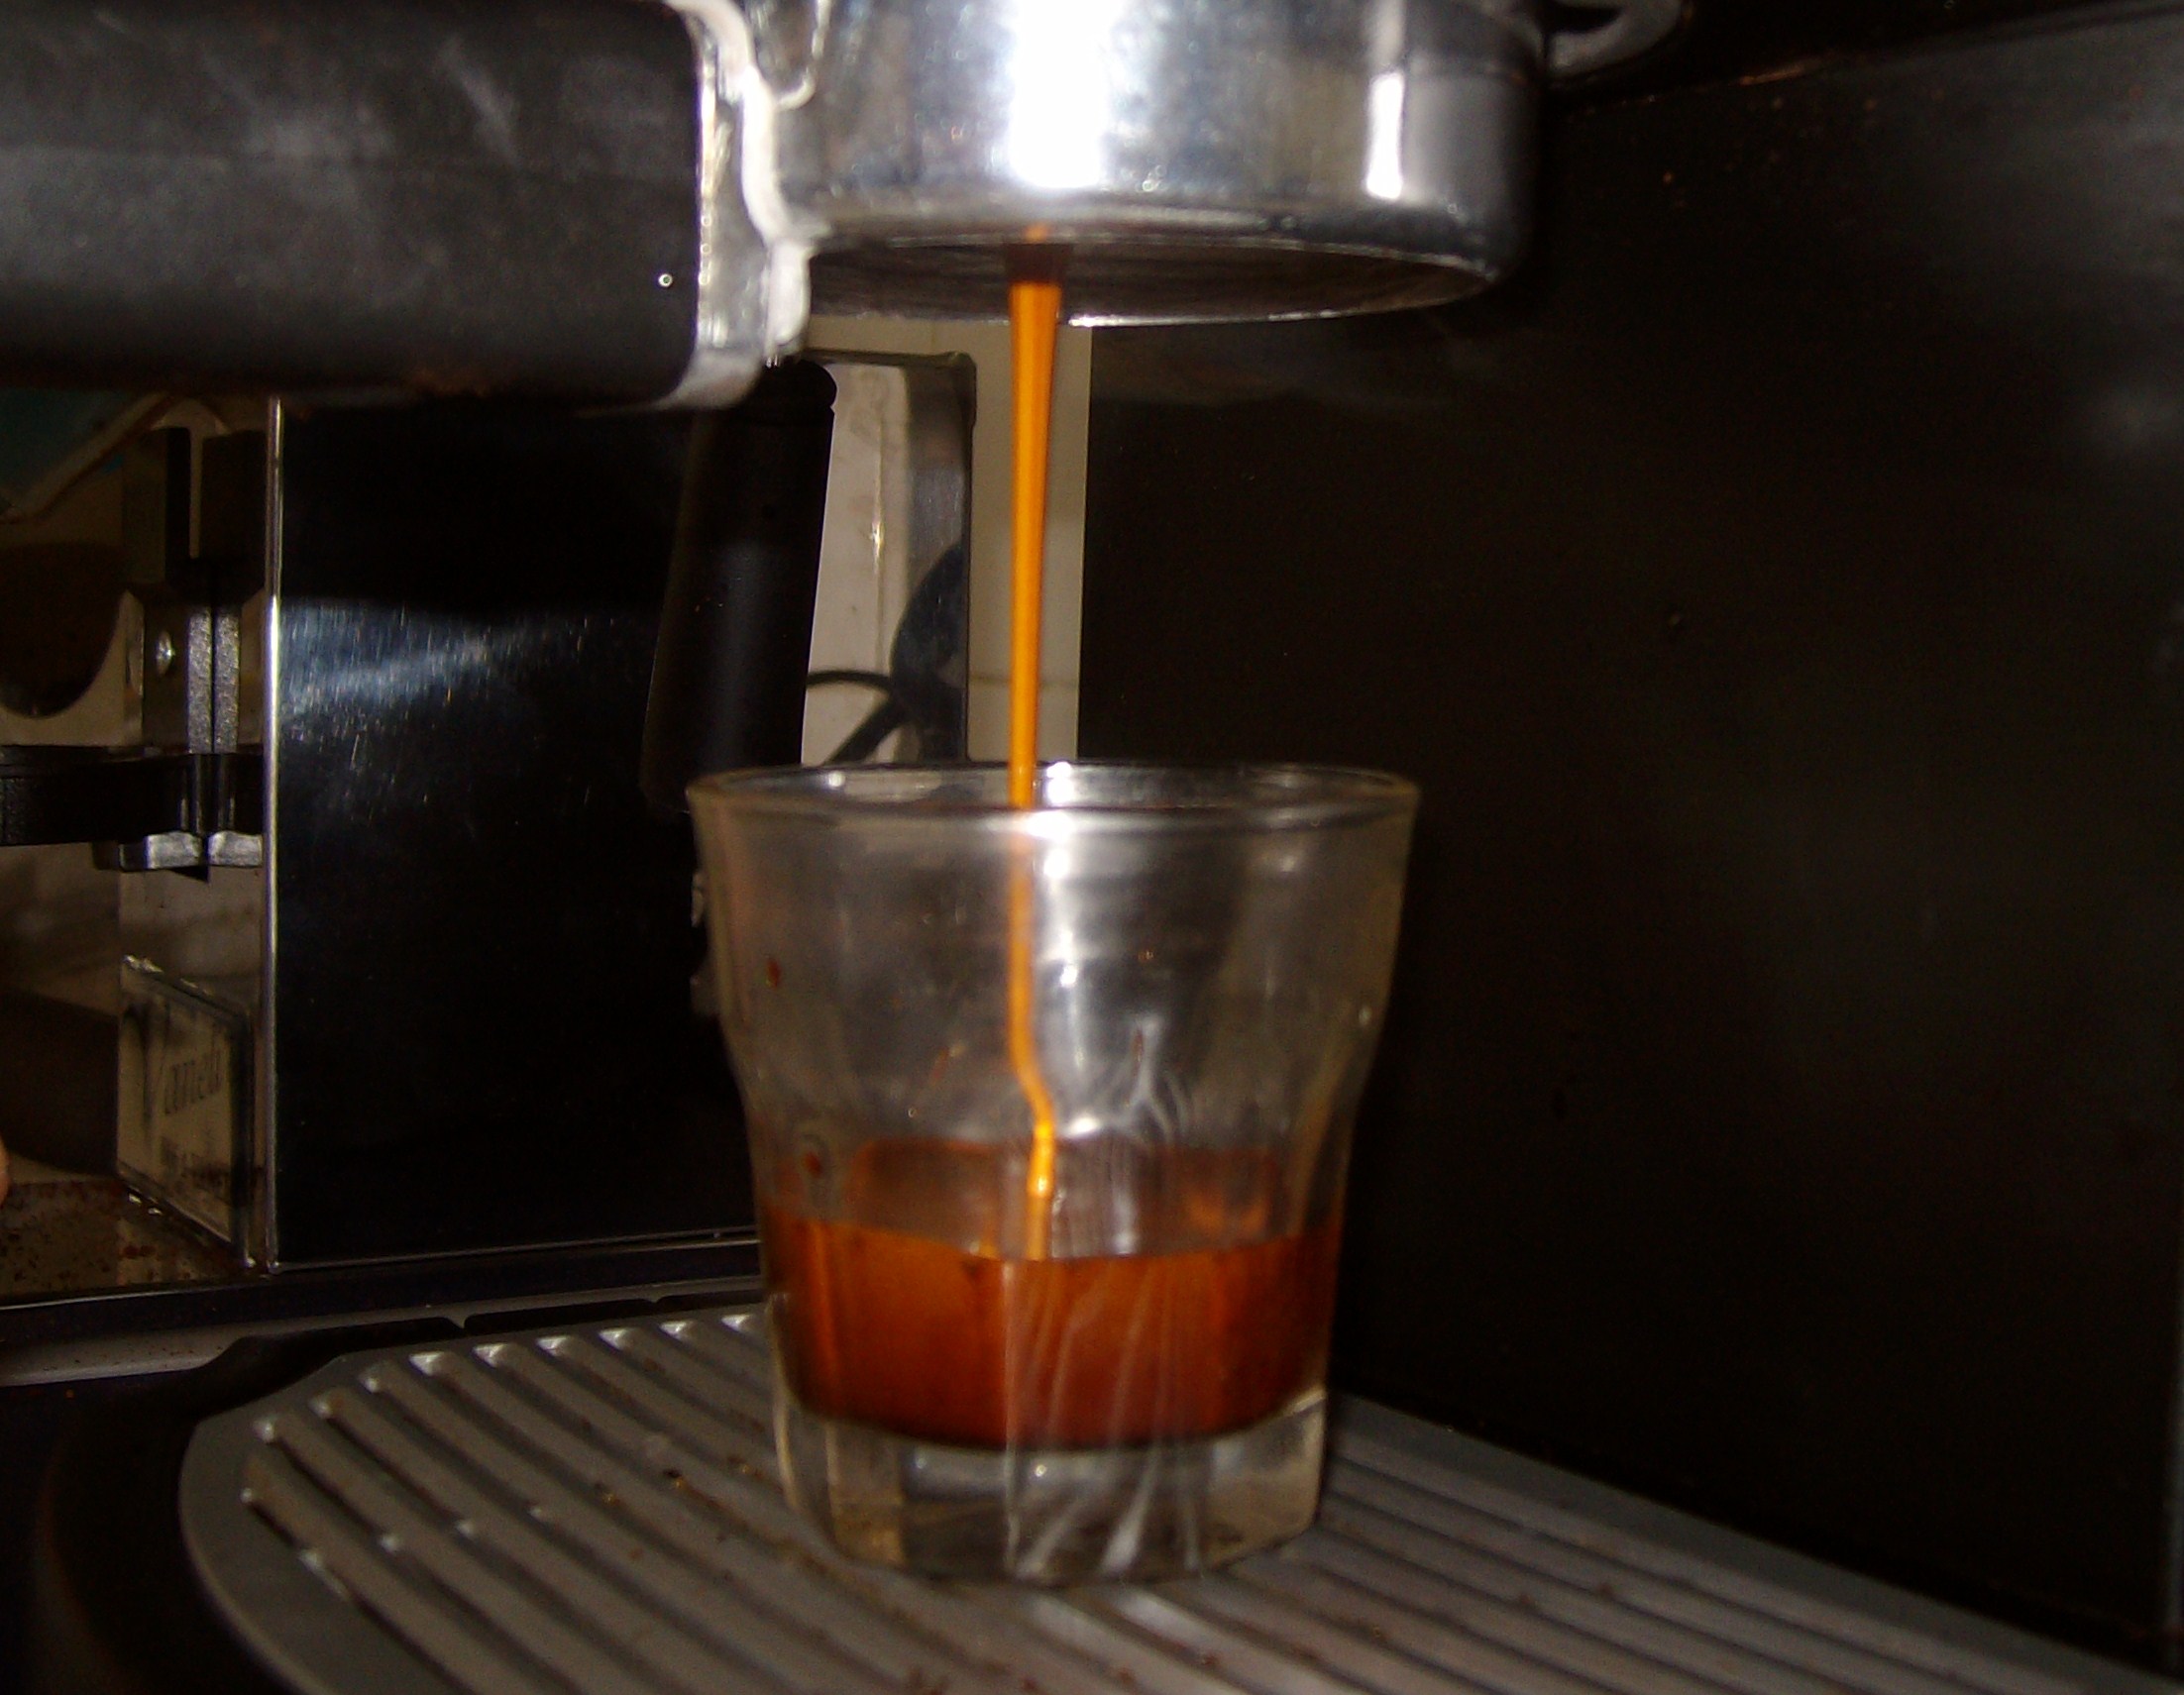
A good shot of espresso should pour like warm honey and fill the cup as mostly crema. So the shot I pulled was pretty decent:
Notice how there is no bottom on my portafilter? I cut the damn thing off so that I can monitor the consistency of my tamp technique. This is quite easy to do with a hole saw.
After ~1 minute, the crema had settled to this:

So that’s what I did with my Labor Day Weekend. What about you?

For my labor day weekend, I watched and listened to my boyfriend get excited about pulling great shots of espresso. In fact, perfect it.
Not complaining in the least though, I get great Americanos (don’t cringe) out of the deal.
Congrats on all your hard work 🙂
Can you post a parts list of what you used to do this? I have this same machine and thinking of doing the same thing.
what’s the one shop in town that you can’t beat??
RRPF,
I’ve since upgraded and so has the Austin coffee scene. The shops I cannot beat with my old toy are Caffe Medici, The Once Over Coffeehouse, and Thunderbird (with their best baristas pulling their best shots).
Hi, just wondering how you opened up the machine to access the parts inside. I just got one of these and I’m having a hard time getting it opened to have a look.
Dwayne,
You have to be rough with her; actually, what you have to do is drill out plastic screw covers in the space made to hold the doser/tamp. From there, just unscrew it. It stays shut fine without the screws, so I discarded them.
Dwayne,
There are plastic caps on screws in the doser/tamper holder. Drill them out and unscrew; when you’ve done that, the top snaps off and on, no need for screws!
Awesome info. I have the same machine… Wondering if you happen to have any pics of the wiring? I’ve got all the parts to do this this weekend, wondering how different wiring-wise the Silvia is from the HB.
Dennis,
I don’t; since upgrading I’ve just had this little guy hanging out in the garage. I’m going to transfer the PID to my new HX machine, so perhaps I could grab a few then.
Excellent, I look (patiently) forward to what you come up with. I’ve basically fine tuned every aspect in my control and gotten some pretty damn good espresso – but I know that the temperature is definitely holding me back, since I’m using the steam button to temp surf completely blind right now.